


Table of Contents
What is phpMyAdmin?
If you have ever managed a MySQL or MariaDB database, you know how intimidating the command line can feel especially when you arre just getting started. That’s where phpMyAdmin steps in. It’s a lightweight, web-based tool that gives you full control over your databases using a clean, graphical interface. No more memorizing long SQL queries or typing endless commands—phpMyAdmin helps simplify those tasks with just a few clicks.
Whether you’re a beginner learning the ropes or an experienced developer looking for efficiency, knowing how to configure phpMyAdmin can save time and reduce errors. From creating tables and running queries to backing up and importing data, phpMyAdmin makes database management much more approachable.
Why Configure phpMyAdmin?
When you configure phpMyAdmin properly, you unlock a smoother, more secure, and efficient workflow tailored to your environment. Customizing the setup allows you to:
-
Adjust access permissions
-
Secure your installation with authentication
-
Optimize performance settings
-
Integrate with your development stack more seamlessly
In this guide, I will walk you through a step-by-step process to install and configure phpMyAdmin on RHEL, CentOS, and Rocky Linux (8.x & 9.x). Whether you’re hosting your own server or managing one for a client, this tutorial will help you get phpMyAdmin up and running in no time.
Let’s get started!
Install phpMyAdmin on RHEL, CentOS & Rocky Linux (8.x/9.x) – Step-by-Step
Managing MySQL databases from the command line isn’t always ideal especially if you prefer a GUI. Since phpMyAdmin isn’t available in the default repos for RHEL, CentOS, or Rocky Linux (8.x/9.x), we will use the Remi repository to install it. Just follow the steps below based on your Linux version to get started.
Step 1: Enable Remi Repository
For CentOS 7 and RHEL 7
To enable the required repositories on CentOS 7 and RHEL 7, execute the following commands:
# wget https://dl.fedoraproject.org/pub/epel/epel-release-latest-7.noarch.rpm
# wget https://rpms.remirepo.net/enterprise/remi-release-7.rpm
# rpm -Uvh remi-release-7.rpm epel-release-latest-7.noarch.rpm

### for RHEL only ###
# subscription-manager repos --enable=rhel-7-server-optional-rpms
For RHEL 7 only: Enable the optional repository with this command:
# subscription-manager repos --enable=rhel-7-server-optional-rpms
For CentOS 8, RHEL 8, Rocky Linux 8, and AlmaLinux 8
Run the following command to install the Remi repository:
# dnf install https://rpms.remirepo.net/enterprise/remi-release-8.rpm
For RHEL 9, AlmaLinux 9, and Rocky Linux 9
Use the command below to enable the Remi repository for version 9.x distributions:
# dnf install https://rpms.remirepo.net/enterprise/remi-release-9.rpm
Step 2: Install phpMyAdmin
Once the Remi repository is enabled, install the phpMyAdmin package using the following command:
# yum install phpmyadmin
See an example below –
[root@web ~]# yum install phpmyadmin
Last metadata expiration check: 0:04:36 ago on Mon 03 Apr 2023 11:19:36 AM EDT.
Dependencies resolved.
=============================================================================================================
 Package              Architecture   Version                                         Repository         Size
=============================================================================================================
Installing:
 phpMyAdmin           noarch         5.2.1-1.el8.remi                                remi              8.9 M
Installing dependencies:
 libzip               x86_64         1.5.1-2.module+el8.4.0+413+c9202dda             appstream          61 k
 php-gd               x86_64         7.2.24-1.module+el8.4.0+413+c9202dda            appstream          83 k
 php-intl             x86_64         7.2.24-1.module+el8.4.0+413+c9202dda            appstream         191 k
 php-json             x86_64         7.2.24-1.module+el8.4.0+413+c9202dda            appstream          72 k
 php-mbstring         x86_64         7.2.24-1.module+el8.4.0+413+c9202dda            appstream         579 k
 php-pecl-zip         x86_64         1.15.3-1.module+el8.4.0+413+c9202dda            appstream          49 k
 php-process          x86_64         7.2.24-1.module+el8.4.0+413+c9202dda            appstream          83 k
 php-xml              x86_64         7.2.24-1.module+el8.4.0+413+c9202dda            appstream         187 k

Transaction Summary
=============================================================================================================
Install  9 Packages
Step 3: Configure phpMyAdmin
Once you have completed the installation of phpMyAdmin, configure phpMyAdmin to allow connections from remote hosts by editing the phpMyAdmin.conf file, located in the Apache conf.d directory at /etc/httpd/conf.d/phpMyAdmin.conf. To do this, comment out the following lines:
# vi /etc/httpd/conf.d/phpmyadmin.conf
Most significantly, after making the changes listed below, you must add “Require all granted,” which will enable network access to phpMyAdmin.
# vi /etc/httpd/conf.d/phpmyadmin.conf

	Alias /phpMyAdmin /usr/share/phpMyAdmin
    Alias /phpmyadmin /usr/share/phpMyAdmin
    <Directory /usr/share/phpMyAdmin/>
       AddDefaultCharset UTF-8
       Require all granted
       Require local
    </Directory>

    <Directory /usr/share/phpMyAdmin/setup/>
       Require local
    </Directory>
Save the file using :wq!
Then restart the apache service and verifiy the access on browser by URL address http://server_IP/phpmyadmin
# systemctl restart httpd
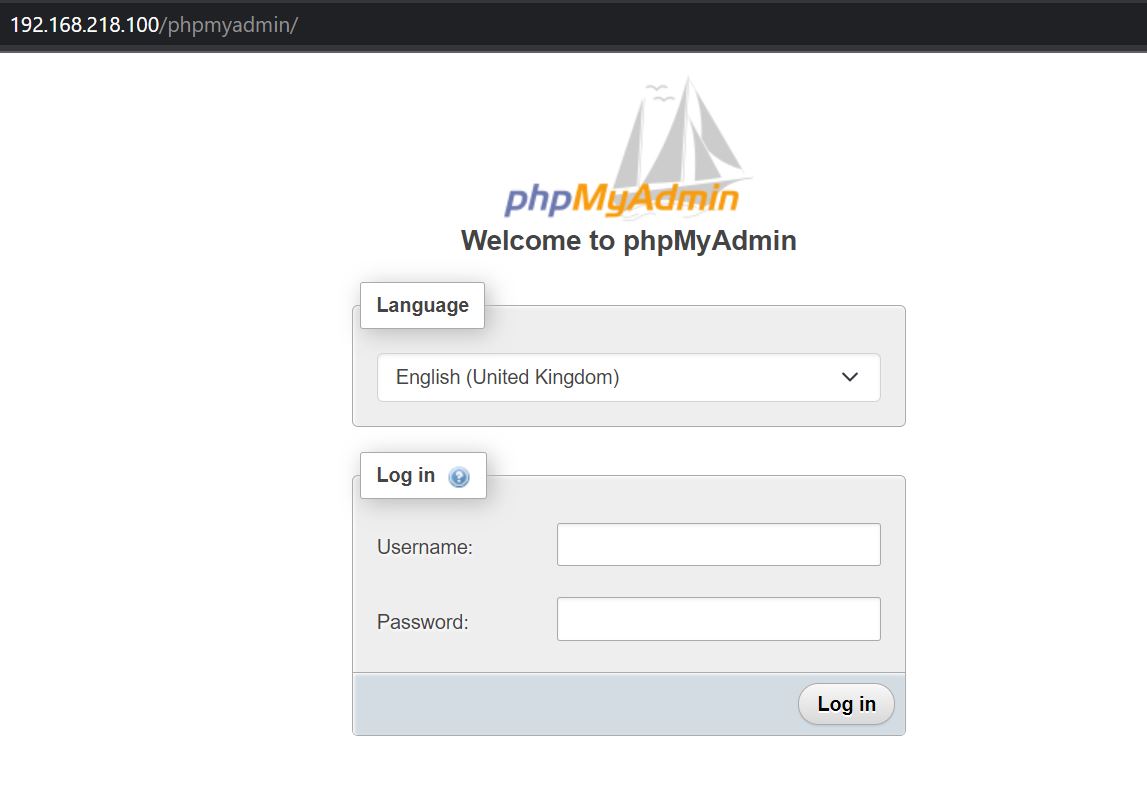
Above image show the phpmyadmin default homepage
Step 4: Configure phpMyAdmin Authentication Type
After installing phpMyAdmin, the next important step is to configure phpMyAdmin authentication method. By default, phpMyAdmin uses cookie-based authentication, which is secure and user-friendly. However, depending on your requirements, you can modify the authentication type in the phpMyAdmin configuration file.
Available Authentication Types
- cookie: The default method. Users log in with their MySQL credentials through a login form. Recommended for most setups.
- http: Uses HTTP Basic Authentication. Prompts users with a browser-based login dialog.
💡 Tip: Planning to use HTTP Basic Auth? Use an online base64-encoder to encode your credentials (e.g.,admin:yourpass) for secure setup. - signon: A single sign-on method where the user is automatically logged in with preconfigured credentials.
- config: MySQL credentials are hardcoded in the configuration file. Not recommended due to security risks.
1- Locate the Configuration File
The main configuration file for phpMyAdmin is typically located in:
/etc/phpMyAdmin/config.inc.php
If it is not present, you might need to copy the sample file:
# cp /usr/share/phpMyAdmin/config.sample.inc.php /etc/phpMyAdmin/config.inc.php
2- Edit the Authentication Type
Open the configuration file in a text editor:
vi /etc/phpMyAdmin/config.inc.php
If it is not present, you might need to copy the sample file:
# cp /usr/share/phpMyAdmin/config.sample.inc.php /etc/phpMyAdmin/config.inc.php
Find the following line in the file:
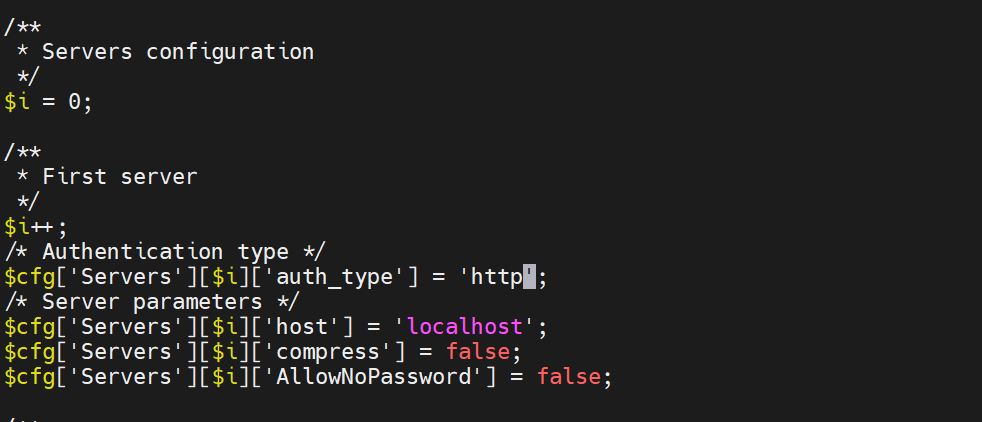
$cfg['Servers'][$i]['auth_type'] = 'cookie';
3- Change the Authentication Type
Modify the auth_type value to your preferred method:
- For cookie-based authentication (default):
$cfg['Servers'][$i]['auth_type'] = 'cookie'; - For HTTP Basic Authentication:
$cfg['Servers'][$i]['auth_type'] = 'http'; - For Sign-On Authentication:
$cfg['Servers'][$i]['auth_type'] = 'signon'; $cfg['Servers'][$i]['SignonSession'] = 'my_session'; $cfg['Servers'][$i]['SignonURL'] = 'https://your-signon-url'; - For Config Authentication (use with caution):
$cfg['Servers'][$i]['auth_type'] = 'config'; $cfg['Servers'][$i]['user'] = 'your_mysql_user'; $cfg['Servers'][$i]['password'] = 'your_mysql_password';
Please refer to the image below that shows the authentication type config changed to http.
4- Save and Restart the Web Server
Save the changes to the configuration file and restart your web server to apply the new settings:
# systemctl restart httpd   # For Apache
# systemctl restart nginx   # For Nginx
Once configured, you can access phpMyAdmin and log in with your MySQL credentials.
You will be required to enter the login credentials for the user account you made earlier in order to access your phpMyAdmin. Since I have only created the MySQL root account and password here; however, in real-time, you will need to create various accounts based on requirements. It is advised to use separate user accounts for various projects.
Verifiy the access on browser by URL address http://server_IP/phpmyadmin

You will be directed to the PHPMyAdmin login page after completing the basic authentication, where you must input your administrative user login information for MySQL or MariaDB.
The phpMyAdmin interface, which you’ll see after logging in, will look something like this:
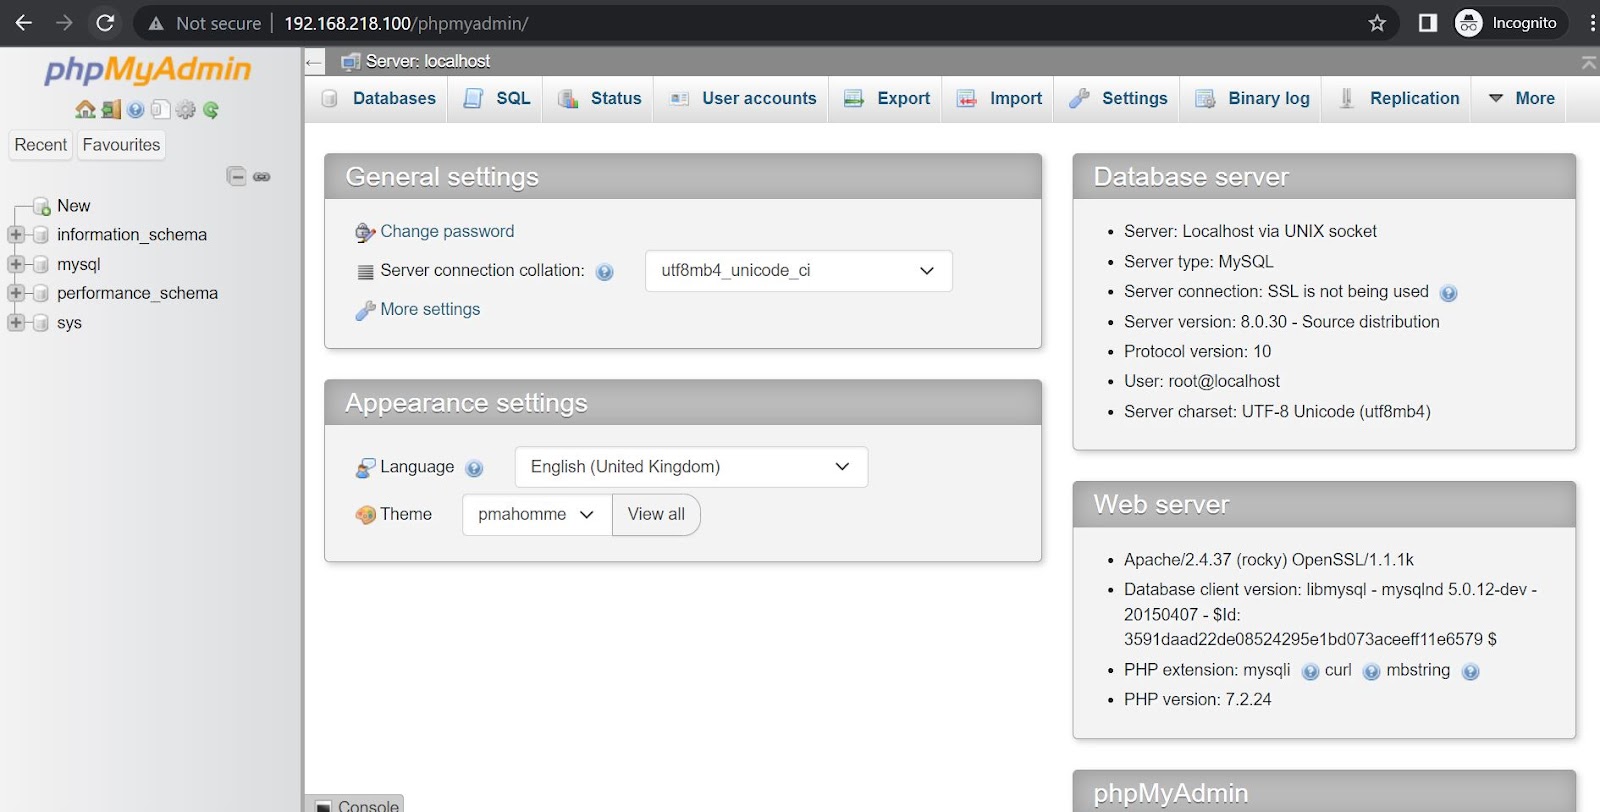
Congratulations! Your phpMyAdmin is now complete, and you can access the MySQL or MariaDB database on your browser.
Best Practices for Security
- Avoid using config authentication on public servers as it stores plaintext credentials.
- Always use cookie authentication for secure access.
- Protect the phpMyAdmin interface with additional security measures such as IP-based restrictions or a firewall.
- Use HTTPS to encrypt data during login and usage1.
Visit this page to restrict access to phpMyAdmin:
==================================================================================
Was this article of use to you? Post your insightful thoughts or recommendations in the comments section if you don’t find this article to be helpful or if you see any outdated information, a problem, or a typo to help this article better.
==================================================================================


