


Secure phpMyAdmin Access on Your Server
Managing databases through phpMyAdmin is convenient but without proper security, it can be an easy target for hackers. If left exposed, unauthorized access to phpMyAdmin could compromise your entire website or application. That’s why securing this powerful tool is not just optional it’s essential. In this guide, we’ll walk you through simple but effective ways lock out your phpMyAdmin secure access using best practices, IP whitelisting, and HTTPS. Whether you’re running Ubuntu, CentOS, or RHEL, these steps will help you minimize risks and gain peace of mind.
The phpMyAdmin interface is accessible by default from any IP address. You can limit access to the application by configuring the Apache or Nginx web servers.
In this article, we will protect phpmyAdmin access to a specific IP address.
If you are looking for phpMyAdmin step-by-step configuration, please refer to the below articles:
How to Install and configure phpMyAdmin in CentOS 8 / RHEL 8 Linux
Secure phpMyAdmin access by IP in Apache
Previously, we installed and configured phpmyAdmin with the Apache web server. Let’s securre phpmyAdmin access based on the apache configuration. Let’s say I want to authorise access of phpMyAdmin from IP address i.e. 192.168.137.1.
1. Login on the server via SSH
2. Take a backup of /etc/httpd/conf.d/phpMyAdmin.conf config.
[root@TechArticles ~]# cp -rvp /etc/httpd/conf.d/phpMyAdmin.conf /root/
'/etc/httpd/conf.d/phpMyAdmin.conf' -> '/root/phpMyAdmin.conf'
[root@TechArticles ~]#
3. Edit /etc/httpd/conf.d/phpMyAdmin.conf config and update below lines under <Directory /usr/share/phpMyAdmin/>
<IfModule mod_authz_core.c>
     # Apache 2.4
     <RequireAny>
       Require ip 127.0.0.1
       Require ip ::1
       Require ip 192.168.137.1

    </RequireAny>
   </IfModule>
   <IfModule !mod_authz_core.c>
     # Apache 2.2
     Order Deny,Allow
     Deny from All
     Allow from 127.0.0.1
     Allow from ::1
   </IfModule>
Note: You can add as many IPs as you want by inserting a space between two IPs or inserting a new IP in a newline i.e.Require ip 192.168.xxx.xx1 192.168.xxx.xx2 192.168.xxx.xx3 or you can add complete subnet Require ip 192.168.1.0/24
4. Check for a httpd syntax error and restart Apache to apply the modifications.
[root@TechArticles ~]# httpd -t
Syntax OK
[root@TechArticles ~]# systemctl restart httpd
[root@TechArticles ~]#
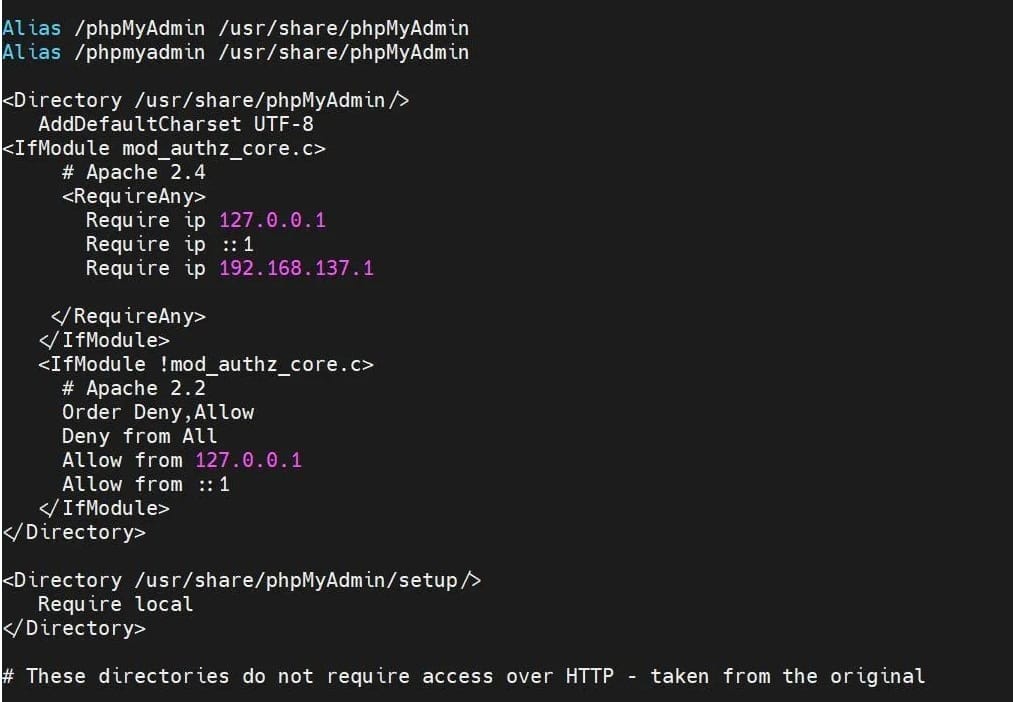
After making the changes, the code will look like this.
Verify access from two separate IPs, the first permitted IP and the second not permitted IP.
Based on the server’s auth type, you will receive a phpMyAdmin login http page or portal from the permitted IP addresses.
If the server’s authentication type is set to cookie, you will see the login prompt shown below.

If the server’s authentication type is set to http, you will see the login prompt shown below.

In all circumstances, restricted IPs will return an error code 403 Forbidden response.

==================================================================================
Was this article of use to you? Post your insightful thoughts or recommendations in the comments section if you don’t find this article to be helpful or if you see any outdated information, a problem, or a typo to help this article better.
==================================================================================


